配置标题栏
我们已经了解了如何配置标题标题,但在继续讨论其他选项之前,让我们再次回顾一下这一点 - 重复是学习的关键!
¥We've seen how to configure the header title already, but let's go over that again before moving on to some other options — repetition is key to learning!
设置标题标题
¥Setting the header title
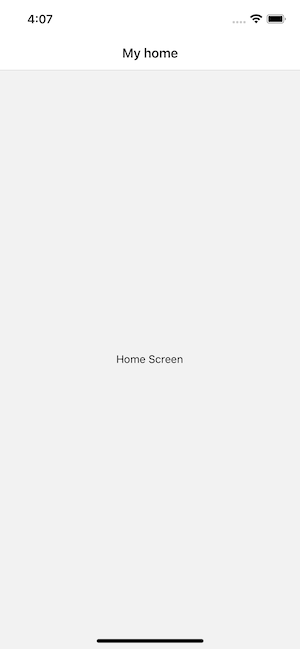
每个屏幕都有 options,它要么是一个对象,要么是一个返回对象的函数,其中包含各种配置选项。我们用于标题的标题是 title,如下例所示。
¥Each screen has options which is either an object or a function that returns an object, that contains various configuration options. The one we use for the header title is title, as shown in the following example.
- Static
- Dynamic
const MyStack = createNativeStackNavigator({
  screens: {
    Home: {
      screen: HomeScreen,
      options: {
        title: 'My home',
      },
    },
  },
});
function MyStack() {
  return (
    <Stack.Navigator>
      <Stack.Screen
        name="Home"
        component={HomeScreen}
        options={{
          title: 'My home',
        }}
      />
    </Stack.Navigator>
  );
}
在标题中使用参数
¥Using params in the title
为了在标题中使用参数,我们需要将屏幕的 options 设为返回配置对象的函数。如果我们将 options 设为函数,那么 React Navigation 将使用包含 { navigation, route } 的对象调用它 - 在这种情况下,我们关心的是 route,它与作为 route 属性传递到屏幕属性的对象相同。你可能还记得,我们可以通过 route.params 获取参数,所以我们下面这样做来提取参数并将其用作标题。
¥In order to use params in the title, we need to make options for the screen a function that returns a configuration object. If we make options a function then React Navigation will call it with an object containing { navigation, route } - in this case, all we care about is route, which is the same object that is passed to your screen props as route prop. You may recall that we can get the params through route.params, and so we do this below to extract a param and use it as a title.
- Static
- Dynamic
const MyStack = createNativeStackNavigator({
  screens: {
    Home: {
      screen: HomeScreen,
      options: {
        title: 'My home',
      },
    },
    Profile: {
      screen: ProfileScreen,
      options: ({ route }) => ({
        title: route.params.name,
      }),
    },
  },
});
function MyStack() {
  return (
    <Stack.Navigator>
      <Stack.Screen
        name="Home"
        component={HomeScreen}
        options={{ title: 'My home' }}
      />
      <Stack.Screen
        name="Profile"
        component={ProfileScreen}
        options={({ route }) => ({
          title: route.params.name,
        })}
      />
    </Stack.Navigator>
  );
}
传入 options 函数的参数是具有以下属性的对象:
¥The argument that is passed in to the options function is an object with the following properties:
-
navigation- 屏幕的 导航对象。¥
navigation- The navigation object for the screen. -
route- 屏幕的 路由对象¥
route- The route object for the screen
在上面的示例中,我们只需要 route 对象,但在某些情况下你可能也想使用 navigation。
¥We only needed the route object in the above example but you may in some cases want to use navigation as well.
将 options 更新为 setOptions
¥Updating options with setOptions
通常需要从安装的屏幕组件本身更新活动屏幕的 options 配置。我们可以使用 navigation.setOptions 来做到这一点
¥It's often necessary to update the options configuration for the active screen from the mounted screen component itself. We can do this using navigation.setOptions
<Button
  onPress={() =>
    navigation.setOptions({ title: 'Updated!' })
  }
>
  Update the title
</Button>
调整标题样式
¥Adjusting header styles
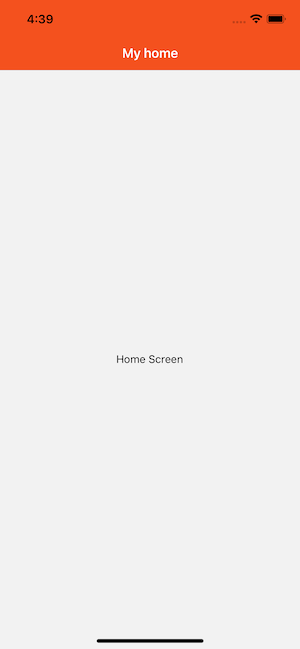
自定义标题样式时需要使用三个关键属性:headerStyle、headerTintColor 和 headerTitleStyle。
¥There are three key properties to use when customizing the style of your header: headerStyle, headerTintColor, and headerTitleStyle.
-
headerStyle:将应用于封装标题的视图的样式对象。如果你设置了backgroundColor,那将是你的标题的颜色。¥
headerStyle: a style object that will be applied to the view that wraps the header. If you setbackgroundColoron it, that will be the color of your header. -
headerTintColor:后退按钮和标题都使用此属性作为其颜色。在下面的示例中,我们将色调颜色设置为白色 (#fff),因此后退按钮和标题标题将为白色。¥
headerTintColor: the back button and title both use this property as their color. In the example below, we set the tint color to white (#fff) so the back button and the header title would be white. -
headerTitleStyle:如果我们想为标题自定义fontFamily、fontWeight等Text样式属性,可以用这个来实现。¥
headerTitleStyle: if we want to customize thefontFamily,fontWeightand otherTextstyle properties for the title, we can use this to do it.
- Static
- Dynamic
const MyStack = createNativeStackNavigator({
  screens: {
    Home: {
      screen: HomeScreen,
      options: {
        title: 'My home',
        headerStyle: {
          backgroundColor: '#f4511e',
        },
        headerTintColor: '#fff',
        headerTitleStyle: {
          fontWeight: 'bold',
        },
      },
    },
  },
});
function MyStack() {
  return (
    <Stack.Navigator>
      <Stack.Screen
        name="Home"
        component={HomeScreen}
        options={{
          title: 'My home',
          headerStyle: {
            backgroundColor: '#f4511e',
          },
          headerTintColor: '#fff',
          headerTitleStyle: {
            fontWeight: 'bold',
          },
        }}
      />
    </Stack.Navigator>
  );
}
这里有几点需要注意:
¥There are a couple of things to notice here:
-
在 iOS 上,状态栏文本和图标是黑色的,这在深色背景上看起来不太好。我们不会在这里讨论它,但你应该确保配置状态栏以适合你的屏幕颜色 如状态栏指南中所述。
¥On iOS, the status bar text and icons are black, and this doesn't look great over a dark-colored background. We won't discuss it here, but you should be sure to configure the status bar to fit with your screen colors as described in the status bar guide.
-
我们设置的配置仅适用于主屏幕;当我们导航到详细信息屏幕时,默认样式又回来了。现在我们将了解如何在屏幕之间共享
options。¥The configuration we set only applies to the home screen; when we navigate to the details screen, the default styles are back. We'll look at how to share
optionsbetween screens now.
跨屏共享通用 options
¥Sharing common options across screens
人们通常希望在许多屏幕上以类似的方式配置标题。例如,你的公司品牌颜色可能是红色,因此你希望标题背景颜色为红色,色调为白色。方便的是,这些是我们在运行示例中使用的颜色,你会注意到,当你导航到 DetailsScreen 时,颜色会恢复为默认值。如果我们必须将 options 标题样式属性从 Home 复制到 Details,并且对于我们在应用中使用的每个屏幕,这不是很糟糕吗?值得庆幸的是,我们没有。我们可以将配置上移到 screenOptions 下的原生堆栈导航器:
¥It is common to want to configure the header in a similar way across many screens. For example, your company brand color might be red and so you want the header background color to be red and the tint color to be white. Conveniently, these are the colors we're using in our running example, and you'll notice that when you navigate to the DetailsScreen the colors go back to the defaults. Wouldn't it be awful if we had to copy the options header style properties from Home to Details, and for every single screen we use in our app? Thankfully, we do not. We can instead move the configuration up to the native stack navigator under screenOptions:
- Static
- Dynamic
const MyStack = createNativeStackNavigator({
  screenOptions: {
    headerStyle: {
      backgroundColor: '#f4511e',
    },
    headerTintColor: '#fff',
    headerTitleStyle: {
      fontWeight: 'bold',
    },
  },
  screens: {
    Home: {
      screen: HomeScreen,
    },
    Details: {
      screen: DetailsScreen,
    },
  },
});
function MyStack() {
  return (
    <Stack.Navigator
      screenOptions={{
        headerStyle: {
          backgroundColor: '#f4511e',
        },
        headerTintColor: '#fff',
        headerTitleStyle: {
          fontWeight: 'bold',
        },
      }}
    >
      <Stack.Screen
        name="Home"
        component={HomeScreen}
        options={{ title: 'My home' }}
      />
      <Stack.Screen name="Details" component={DetailsScreen} />
    </Stack.Navigator>
  );
}
现在,属于此导航器的任何屏幕都将拥有我们精彩的品牌风格。当然,如果我们需要的话,一定有办法覆盖这些选项吗?
¥Now, any screen that belongs to this navigator will have our wonderful branded styles. Surely though, there must be a way to override these options if we need to?
用自定义组件替换标题
¥Replacing the title with a custom component
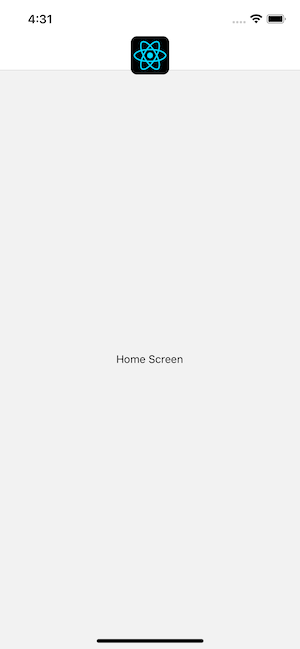
有时,你需要更多的控制,而不仅仅是更改标题的文本和样式 - 例如,你可能想要渲染图片来代替标题,或者将标题设置为按钮。在这些情况下,你可以完全覆盖用于标题的组件并提供你自己的组件。
¥Sometimes you need more control than just changing the text and styles of your title -- for example, you may want to render an image in place of the title, or make the title into a button. In these cases you can completely override the component used for the title and provide your own.
- Static
- Dynamic
function LogoTitle() {
  return (
    <Image
      style={{ width: 50, height: 50 }}
      source={require('@expo/snack-static/react-native-logo.png')}
    />
  );
}

const MyStack = createNativeStackNavigator({
  screens: {
    Home: {
      screen: HomeScreen,
      options: {
        headerTitle: (props) => <LogoTitle {...props} />,
      },
    },
  },
});
function LogoTitle() {
  return (
    <Image
      style={{ width: 50, height: 50 }}
      source={require('@expo/snack-static/react-native-logo.png')}
    />
  );
}

function MyStack() {
  return (
    <Stack.Navigator>
      <Stack.Screen
        name="Home"
        component={HomeScreen}
        options={{
          headerTitle: (props) => <LogoTitle {...props} />,
        }}
      />
    </Stack.Navigator>
  );
}
你可能想知道,为什么当我们提供组件时是 headerTitle,而不是像以前那样提供 title?原因是 headerTitle 是特定于堆栈导航器的属性,headerTitle 默认为显示 title 的 Text 组件。
¥You might be wondering, why headerTitle when we provide a component and not title, like before? The reason is that headerTitle is a property that is specific to stack navigators, the headerTitle defaults to a Text component that displays the title.
你可能想知道,为什么当我们提供组件时是 headerTitle,而不是像以前那样提供 title?原因是 headerTitle 是特定于标题的属性,而 title 也将用于选项卡栏、抽屉等。headerTitle 默认为显示 title 的 Text 组件。
¥You might be wondering, why headerTitle when we provide a component and not title, like before? The reason is that headerTitle is a property that is specific to headers, whereas title will be used for tab bars, drawers etc. as well. The headerTitle defaults to a Text component that displays the title.
附加配置
¥Additional configuration
你可以阅读 createNativeStackNavigator 参考 中原生堆栈导航器内屏幕的可用 options 的完整列表。
¥You can read the full list of available options for screens inside of a native stack navigator in the createNativeStackNavigator reference.
概括
¥Summary
-
你可以在屏幕的
options属性内自定义标题。阅读选项 在 API 参考中 的完整列表。¥You can customize the header inside of the
optionsproperty of your screens. Read the full list of options in the API reference. -
options属性可以是对象或函数。当它是一个函数时,它会提供一个具有navigation和route对象的对象。¥The
optionsproperty can be an object or a function. When it is a function, it is provided with an object with thenavigationandrouteobjects. -
你还可以在初始化堆栈导航器配置时指定共享
screenOptions。这将适用于导航器中的所有屏幕。¥You can also specify shared
screenOptionsin the stack navigator configuration when you initialize it. This will apply to all screens in the navigator.